
LCD Screen
LCD screens are small screens that can display text. The following lesson will teach you how to wire up an LCD screen to an Arduino and how to code it.
Circuit
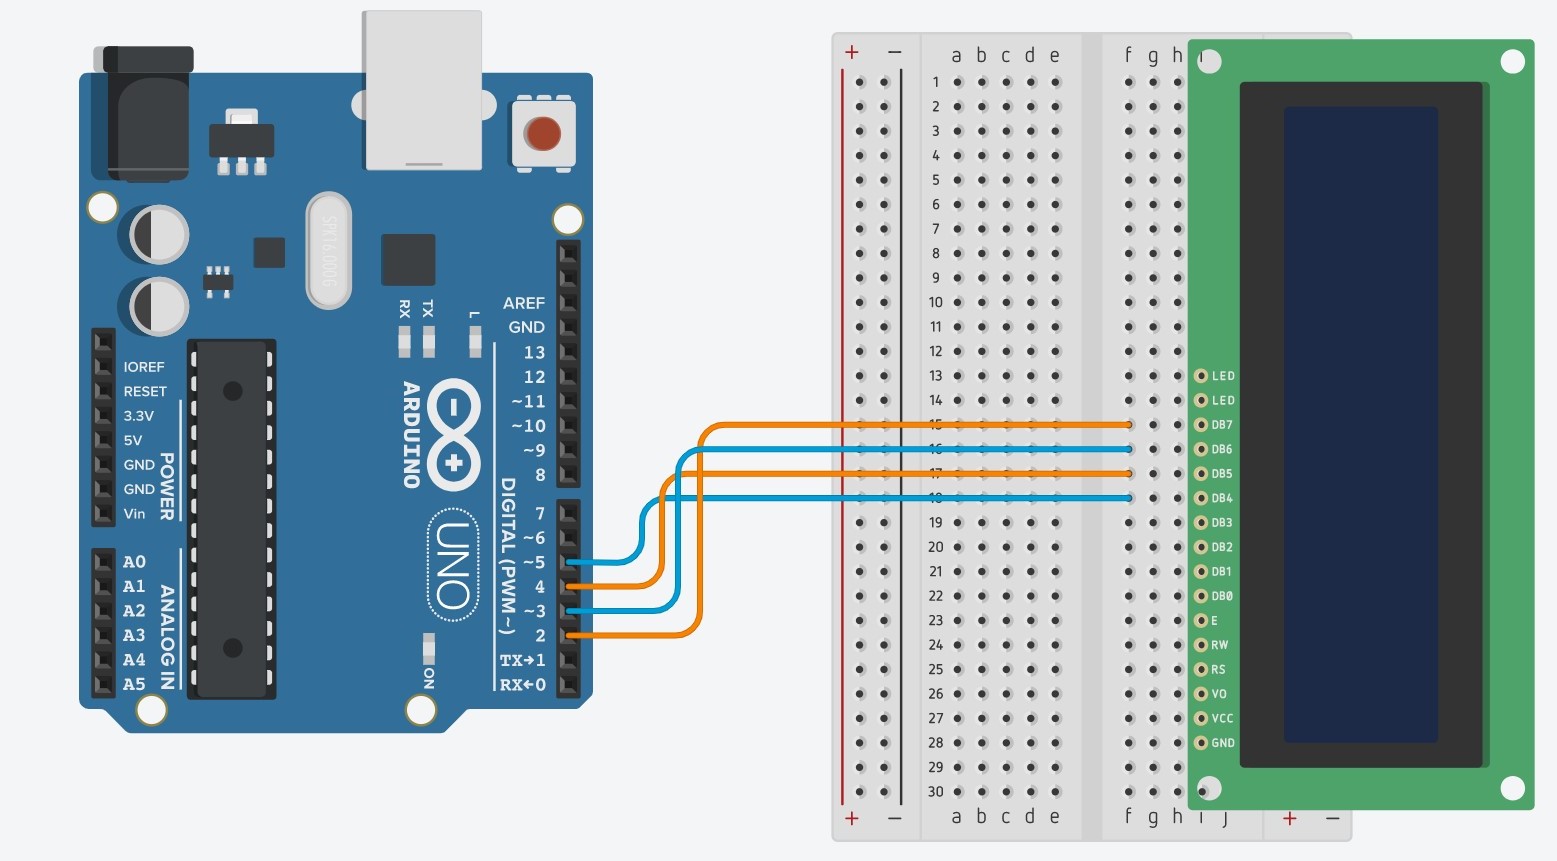
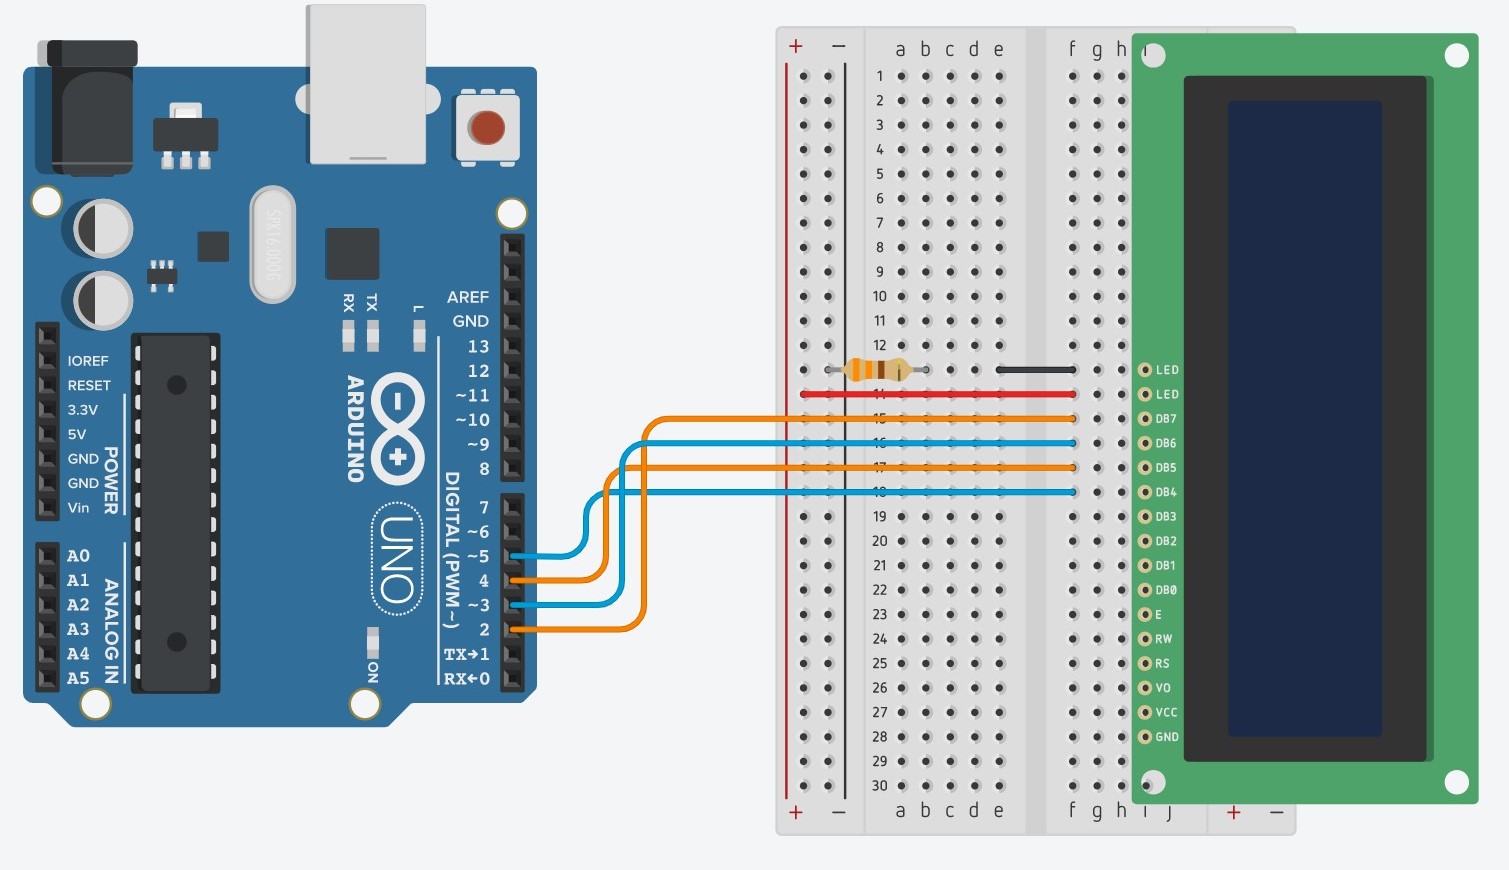
The LCD screen uses 4 pins for transferring data from the Arduino to the LCD. These are the pins labelled D84, D85, D86, and D87. Connect these pins to digital pins 5, 4, 3, and 2 on the Arduino like this:
The two pins labelled “LED” are for the backlight in the LCD. The backlight is just an LED, so you wire it just like a regular LED: one pin goes to the ground rail (with a 330 ohm resistor), the other goes to the 5V rail.
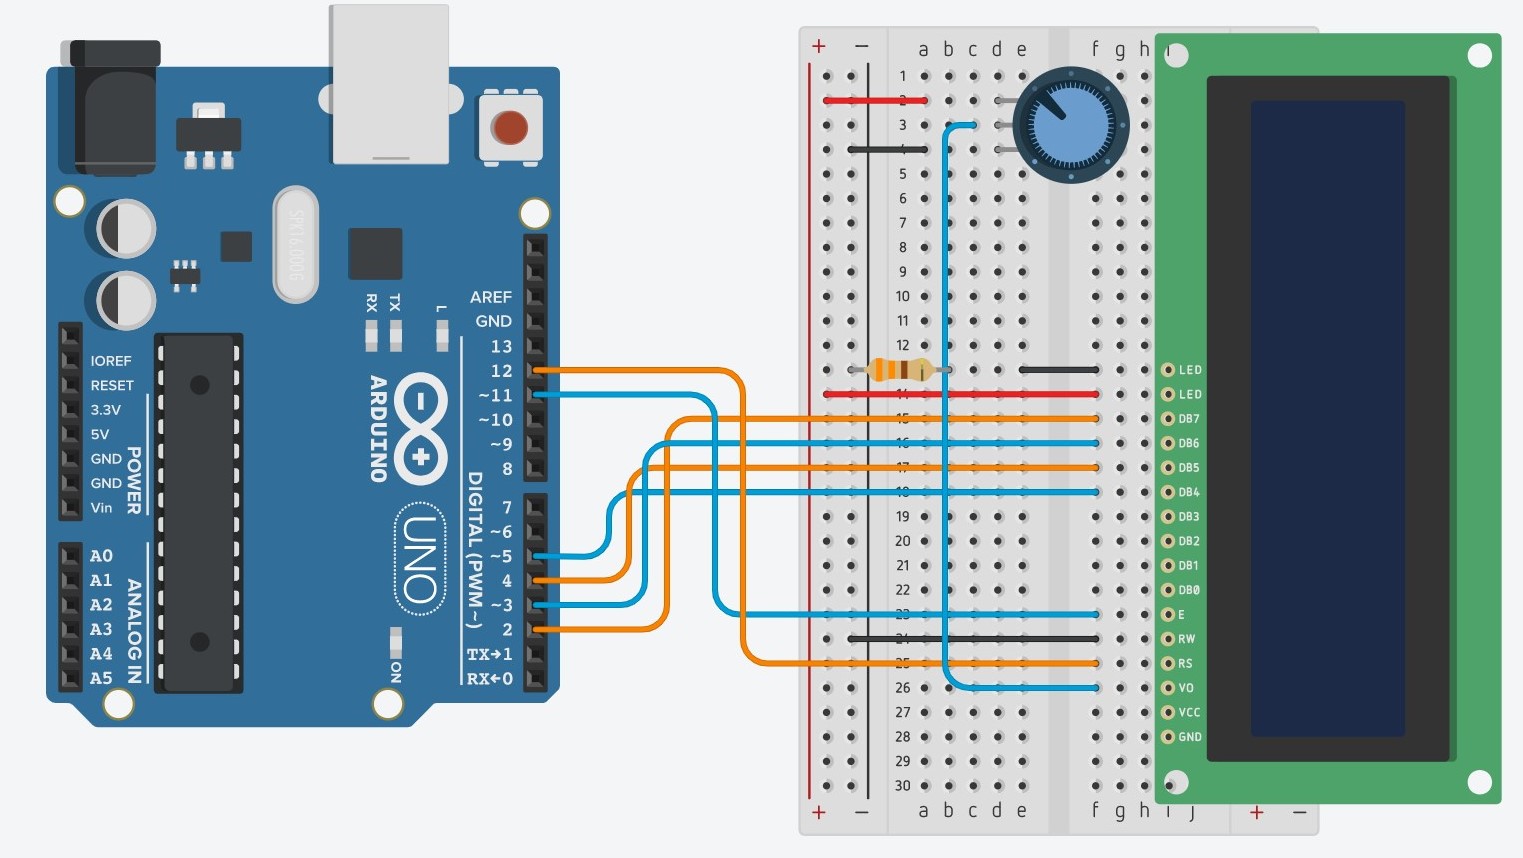
Now you will need to wire a potentiometer (a knob) to the breadboard. The potentiometer is for changing the brightness of the backlight on the LCD. Instead of connecting the middle pin on the potentiometer to an analog pin on the Arduino, this time connect it to the V0 pin on the LCD. Connect the two sides of the potentiometer to the positive and negative rails like usual.

Now connect the E pin to pin 11 on the Arduino, the RS pin to pin 12 on the Arduino, and the RW pin to the GND pin on the Arduino. Don’t worry too much about what these pins are for right now.
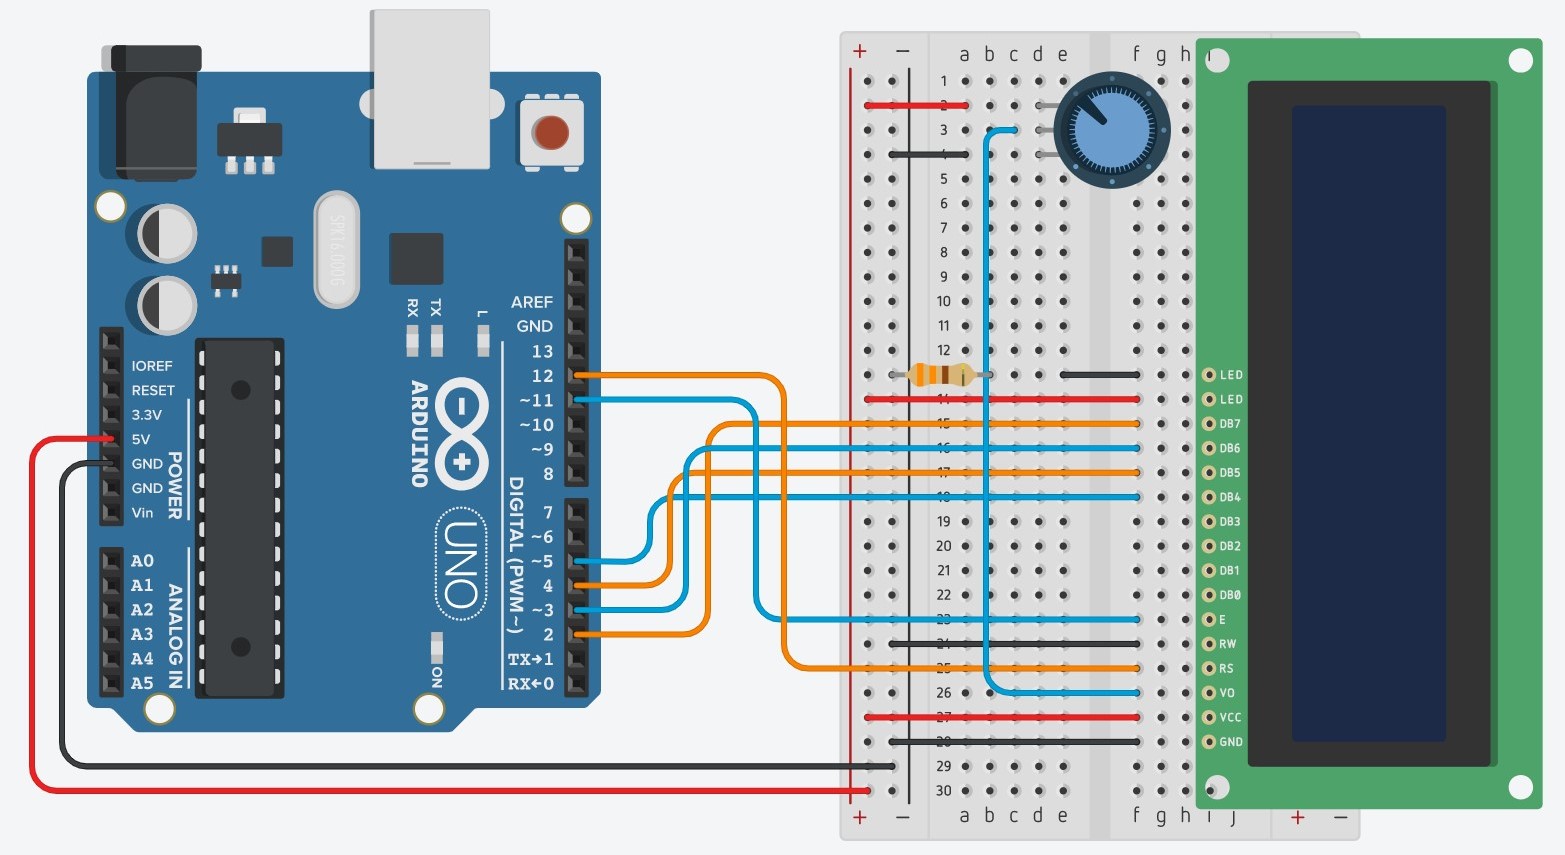
And of course, connect the VCC pin to the positive rail and the GND pin to the negative rail, then connect a wire from 5V on the Arduino to the positive rail and from GND on the arduino to the negative rail.
And then you’re done! Phew!! Now time for the code!
Code: The LiquidCrystal library
Before you can start coding the LCD at all, you have to include the library with an include statement:
#include <LiquidCrystal.h>
Right after the include statement, you will need to begin the LCD object like so:
	LiquidCrystal lcd(12,11,5,4,3,2);
    The numbers are all of the pins on the Arduino that we used when we created the circuit. If you change any of the pins, change these numbers as well. Now we can begin the code within setup and loop.
   In void setup, you will need to tell the Arduino how many rows and columns of letters you want to be displayed. The maximum is usually 16 columns and 2 rows so this is what we will do. This is accomplished using the lcd.begin function:
    		lcd.begin(16,2);
       If you want to actually write something to your LCD, you will need to use the print function like this:
        		lcd.print("MESA Rocks!!");
          What if you want to print at a different location than the first row and first column? This is what the setcursor function is for. It moves the location on the LCD where the print function will print the letters. For example,
           		lcd.setCursor(0,1);
             will start printing at column 0 (the first column), row 1 (the second column).
             Lastly, what if you want to clear everything off of the LCD? Then you use the clear function:
               		lcd.clear();
                 This will clear all of the words off of the screen and reset the cursor location to row 0 column 0 (first row first column).

  You can access this project on tinkercad here: